December 23, 2014
Video Tip: How to quickly add labels to background images in Tableau
I don't use background images often in Tableau. In fact, I never knew how to REALLY use them until I went to Tableau Trainer Certification with Molly Monsey, trainer extraordinaire at Tableau. With Molly's permission, I am sharing with you the super simple way that she showed us how to add labels to background images in Tableau.
First, here is the video and farther down the page are summarized steps with screenshots.
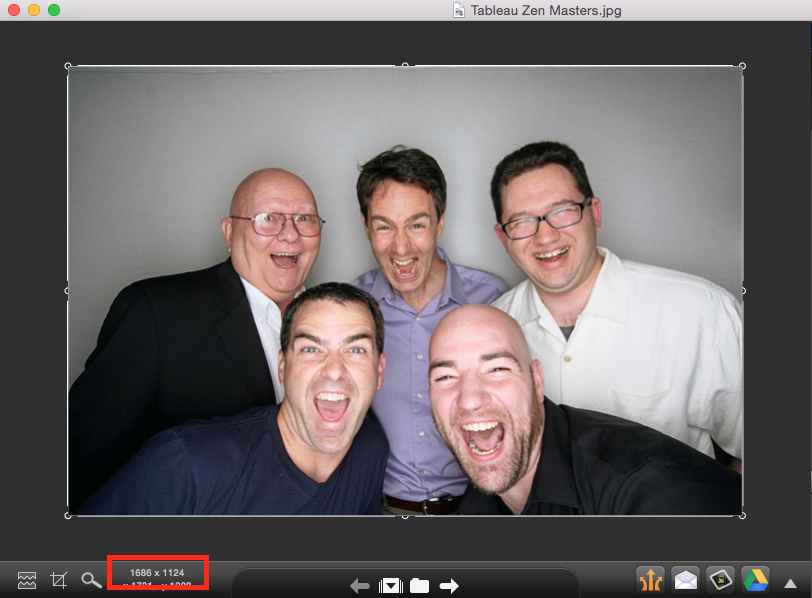
Step 1: Open the background image in a tool like Snagit to get the dimensions. Write the dimensions down.
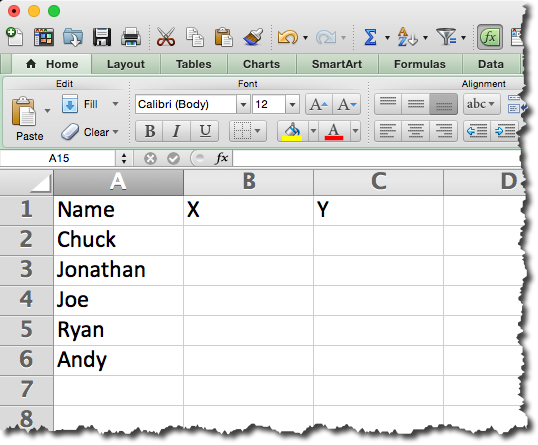
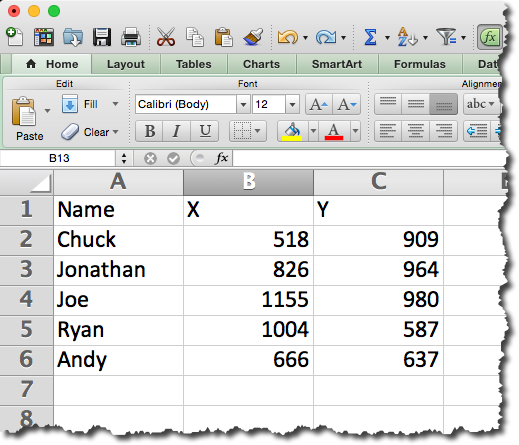
Step 2: Create a data source. In this example, I created the outline of the data source in Excel and left the X/Y coordinates blank.
Step 3: Connect to the data source created in step 2 in Tableau.
Step 4: Change the data type for the X & Y fields to Numbers and move them to the measures area.
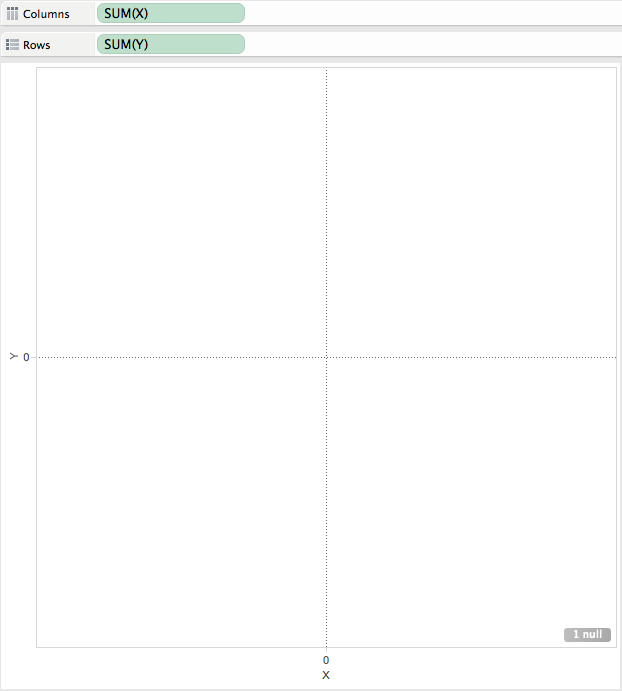
Step 5: Add the X field to the Columns shelf and the Y field to the Rows shelf.
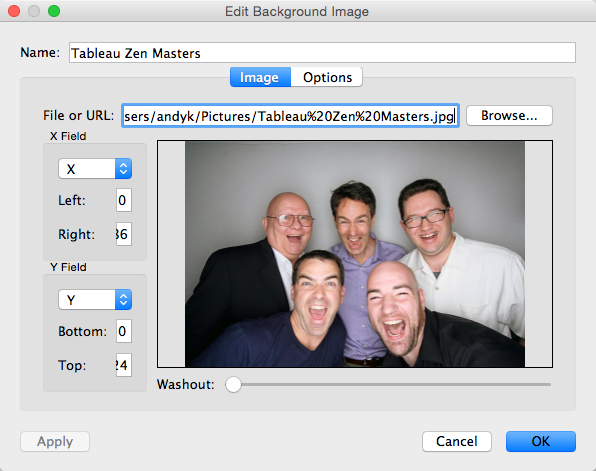
Step 6: Add the background image by going to Map => Background Image => [Sheet Name]. Choose the image and enter the dimensions that you wrote down in step 1 in the Right and Top boxes respectively.
Step 7 (optional): Fix the axes to the size of the image.
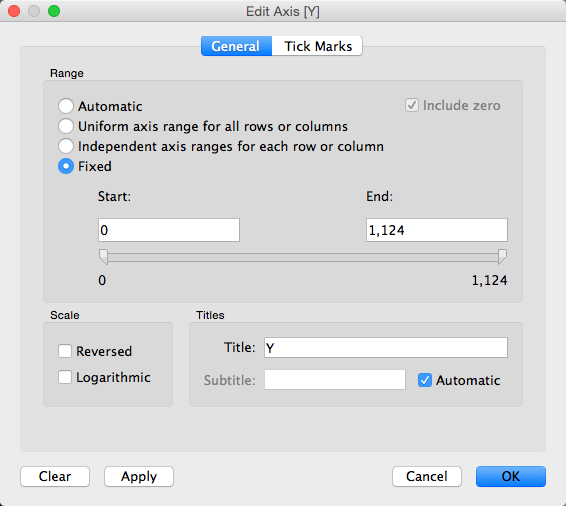
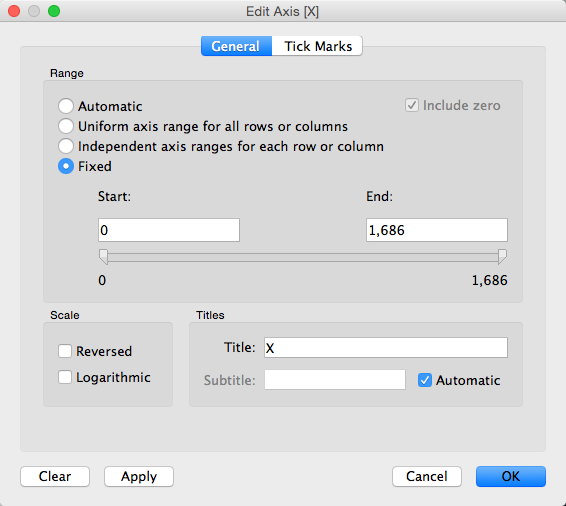
Step 8: Hide the axis headers.
Step 9: Drag the Name field to the Label shelf.
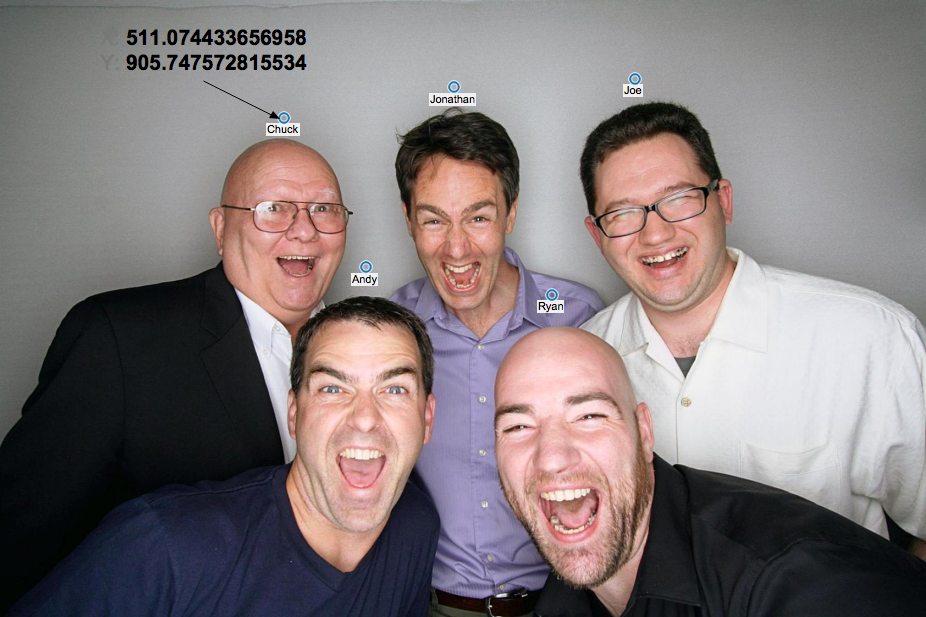
Step 10: Annotate a point with the X/Y coordinates.
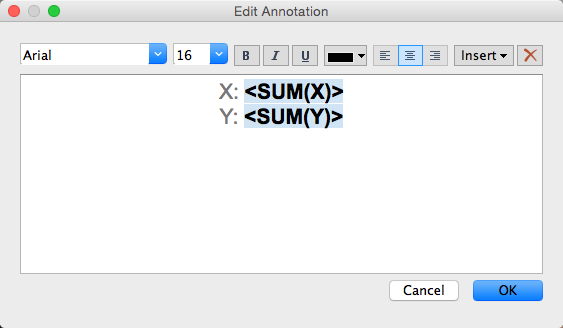
Note how this looks after you hit OK. You can now move the end of the arrow around to get the coordinates of any point in the image.
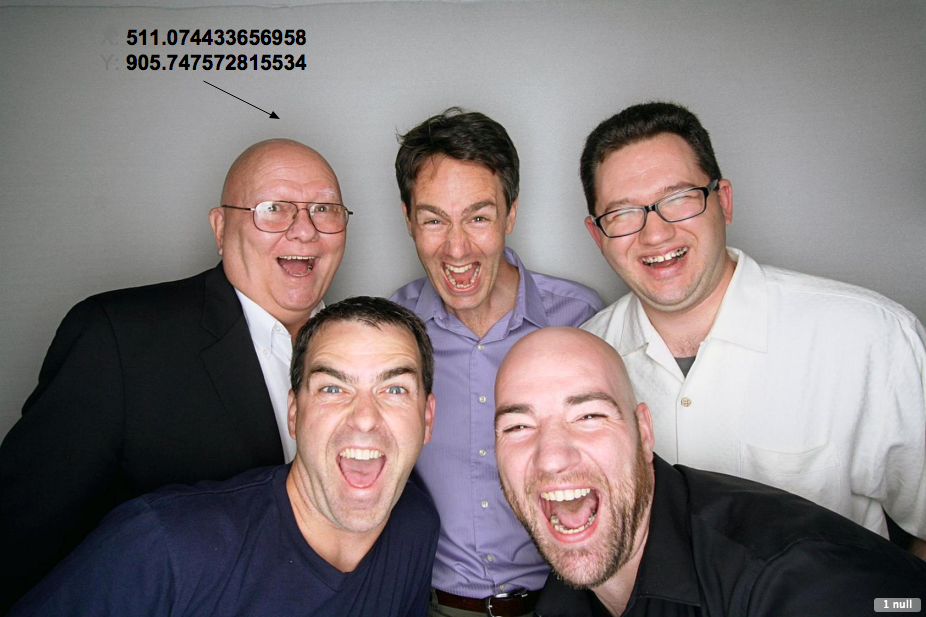
Step 11: Move the end of the arrow around to each place in the image that you want to place a label and enter those X/Y values into the Excel spreadsheet. Save the Excel spreadsheet.
Step 12: Refresh the data source in Tableau and the labels will magically appear above the heads of each person.
Step 13: Remove the annotation.
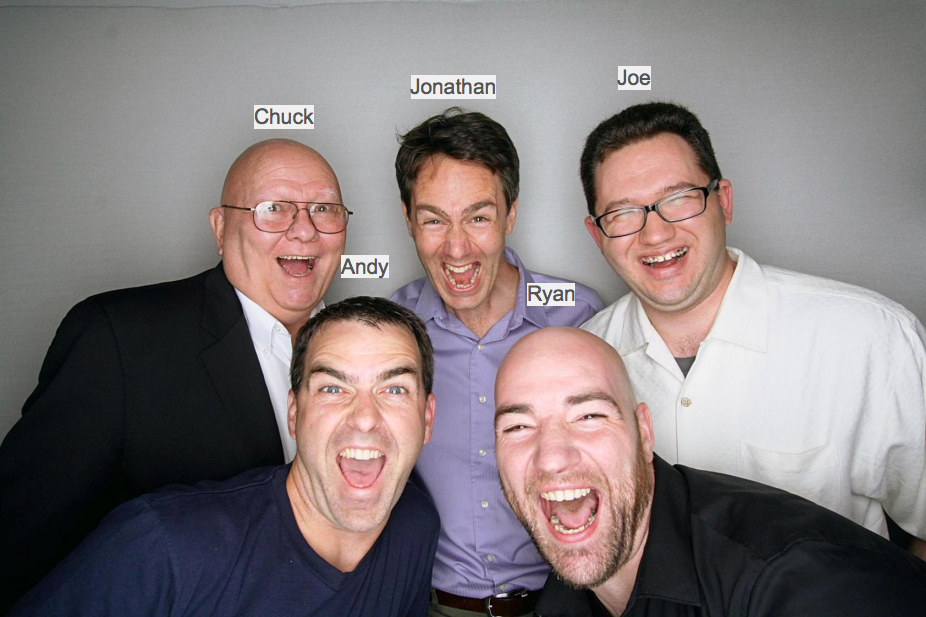
Step 14: Change the Mark Type to Text and format the text as you see fit. That's it!
You can download the Excel file here and the Tableau workbook here.
First, here is the video and farther down the page are summarized steps with screenshots.
Step 1: Open the background image in a tool like Snagit to get the dimensions. Write the dimensions down.

Step 2: Create a data source. In this example, I created the outline of the data source in Excel and left the X/Y coordinates blank.

Step 3: Connect to the data source created in step 2 in Tableau.
Step 4: Change the data type for the X & Y fields to Numbers and move them to the measures area.
Step 5: Add the X field to the Columns shelf and the Y field to the Rows shelf.

Step 6: Add the background image by going to Map => Background Image => [Sheet Name]. Choose the image and enter the dimensions that you wrote down in step 1 in the Right and Top boxes respectively.

Step 7 (optional): Fix the axes to the size of the image.


Step 8: Hide the axis headers.
Step 9: Drag the Name field to the Label shelf.
Step 10: Annotate a point with the X/Y coordinates.

Note how this looks after you hit OK. You can now move the end of the arrow around to get the coordinates of any point in the image.

Step 11: Move the end of the arrow around to each place in the image that you want to place a label and enter those X/Y values into the Excel spreadsheet. Save the Excel spreadsheet.

Step 12: Refresh the data source in Tableau and the labels will magically appear above the heads of each person.

Step 13: Remove the annotation.
Step 14: Change the Mark Type to Text and format the text as you see fit. That's it!

You can download the Excel file here and the Tableau workbook here.
Subscribe to:
Post Comments
(
Atom
)


FULL OF KNOWLEDGE!!
ReplyDeleteCan you make background of the names transparent?
ReplyDeleteNot that I see
DeleteI tried following the exact same steps and it did show up for me once, which btw was so cool. then when i started adding more label values it just disappeared and i have tried to recreate the workbook, close the workbook and start again, restart my computer but nothing seems to be working, do you know of a reason which I am missing out?
ReplyDeletethanks!
I don't know why it would do that. Try posting on the forums.
Delete